My audience
Adding contacts in bulk
Bringing your existing mailing list to Trackdrop is quick and easy.
If you have a large number of contacts to import, we recommend using our CSV importer to keep the process efficient.
Read on in this article to find out how, or check out how to add individual contacts here [Link to 'Adding individual contacts'].
Step 1 - Prepare your contact file
Depending on the systems you use to manage your contacts, you can create a CSV file by making a table with your contacts’ information, or by exporting the data directly from your current provider.
Creating a new CSV file
Creating a new CSV file is simple, and once you’ve set up your template, it’s quick and easy to add in extra contacts.
All you need is the name and email address for each of your contacts.
Simply set up your file by opening a spreadsheet editor (like Excel, Google Sheets, or Numbers), and create two columns: one for the name, and one for the email address.
You can include a column name at the top to keep things organized.
Tip: Not sure about the format? Click Download template inside the importer to get a ready-made CSV file with the correct column headers.
Now, add in your contact information. When you’re done, export your file as a CSV.
In Excel: ‘File’ > ‘Save as’ > ‘CSV (Comma delimited)’
In Google Sheets: ‘File’ > ‘Download’ > ‘Comma Separated Values (csv)’
In Numbers: ‘File’ > ‘Export to’> ‘CSV…’
Using an existing CSV file
This option is great if you already use a list or a spreadsheet to manage your contacts, or if you’d like to export your contacts from another provider.
Just make sure that your existing file has separate columns for each contact’s name and email address.
The importer recognizes column names like email, e-mail, email address, or mail, and name, full name, contact name, or display name, and will try to assign ‘name’ or ‘email’ accordingly.
If your CSV file has extra columns, you can choose to upload the file and ignore the data. Alternatively, you can edit your CSV file to remove them before uploading.
NB: It’s currently only possible to assign one name and one email address to each contact. This means that, if your file has first names and last names in separate columns, you would need to choose which column to import or manually merge the data before uploading.
Remember to export your document as a CSV after making any changes.
Step 2 - Uploading your contact file
Sign in to your Trackdrop account.
Click Audience in the left-hand sidebar
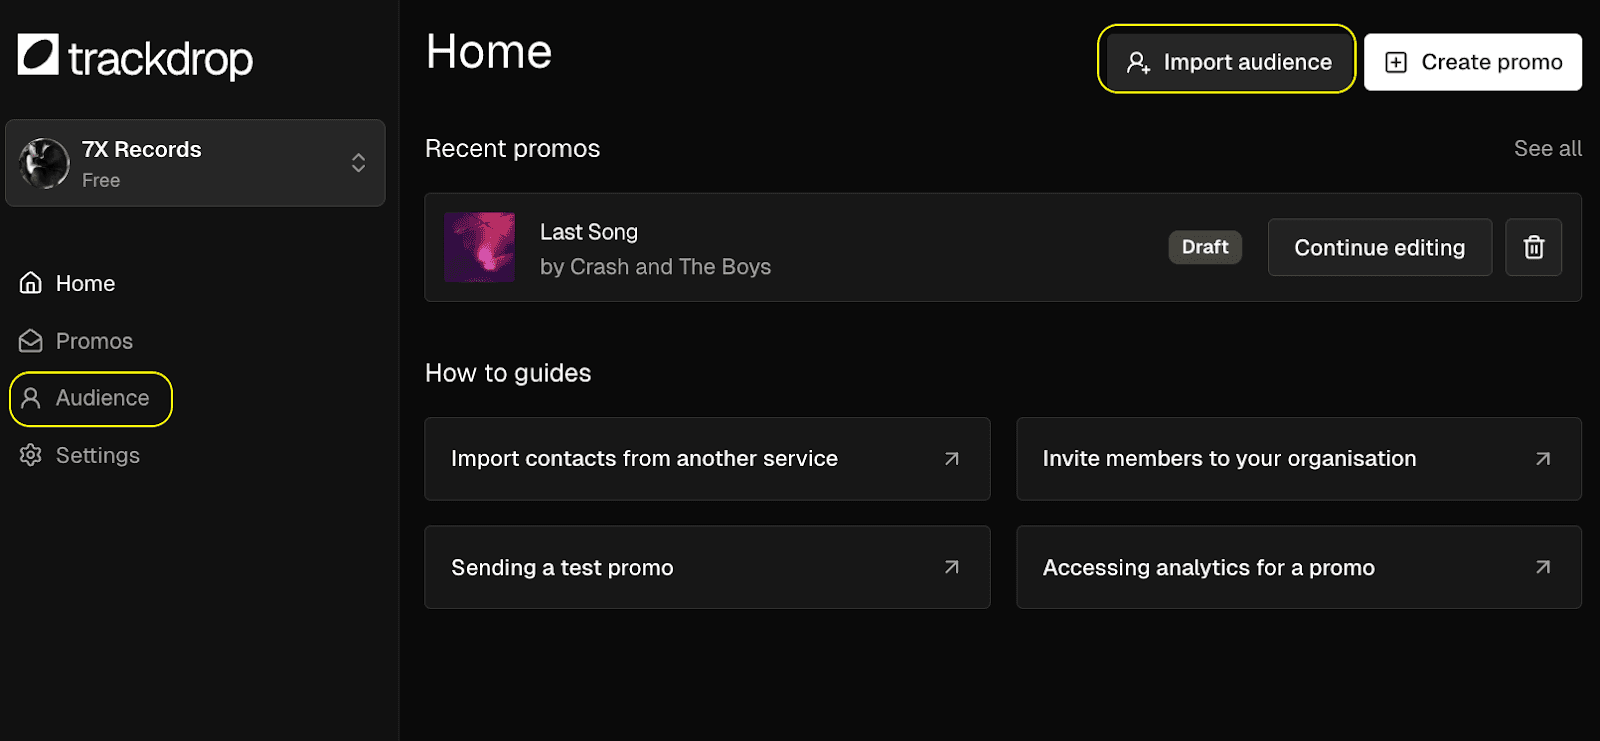
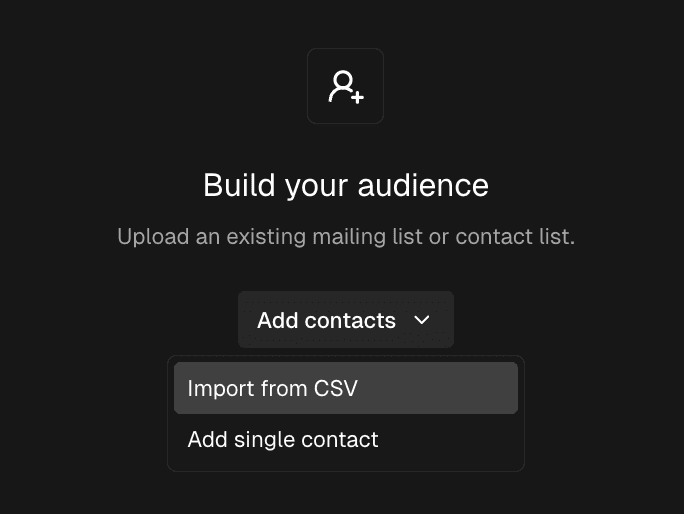
You'll land on the Audience page, which shows a table of all your contacts. If you haven't added anyone yet, you'll see a prompt inviting you to build your audience.Click Add contacts, then select Import from CSV from the dropdown list.
A CSV importer dialog will open. Once your file is ready, either:
Click Click to upload to browse for your file, or
Drag and drop your
.csvfile directly into the upload area.
The importer will read your file and move automatically to the next step.
Step 3 - Map your columns
Trackdrop will preview your file and try to match your column headers to the right contact fields automatically.
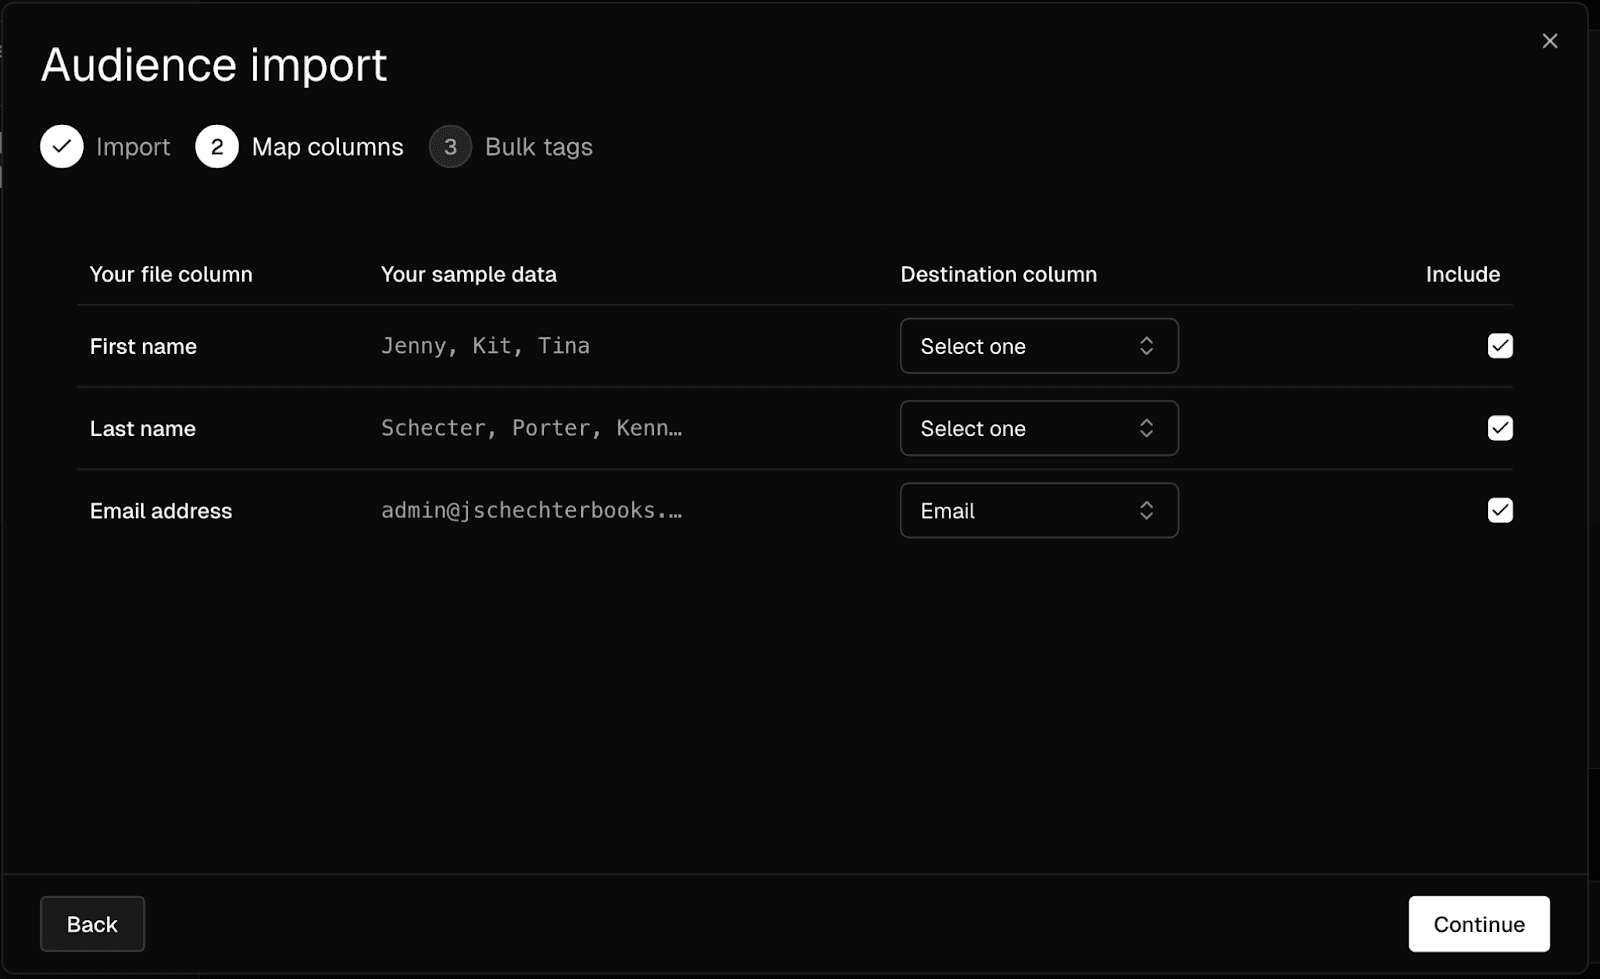
The mapping table shows:
Column | What it means |
Your file column | The column headers from your CSV file |
Your sample data | A preview of some of the actual values in each column |
Destination column | The Trackdrop field this column will map to (Email or Name) |
Include | Toggle this on or off to include or exclude a column from the import |
Take a moment to check that the right information is being mapped to the email and name columns.
If a column has been matched to the wrong field, use the Destination column dropdown to correct it.
If there's a column you don't need (for example, extra metadata from another system), simply turn off its Include toggle. Please note you can only display one name and email per contact.
Step 4 - Adding audience tags (optional)
Trackdrop lets you organize your contacts using tags.
When you import into your audience, you can use this feature to quickly add one or more tags to all of the contacts in your CSV file.
This is an optional step, and you can always add tags to individual audience members or in bulk later.
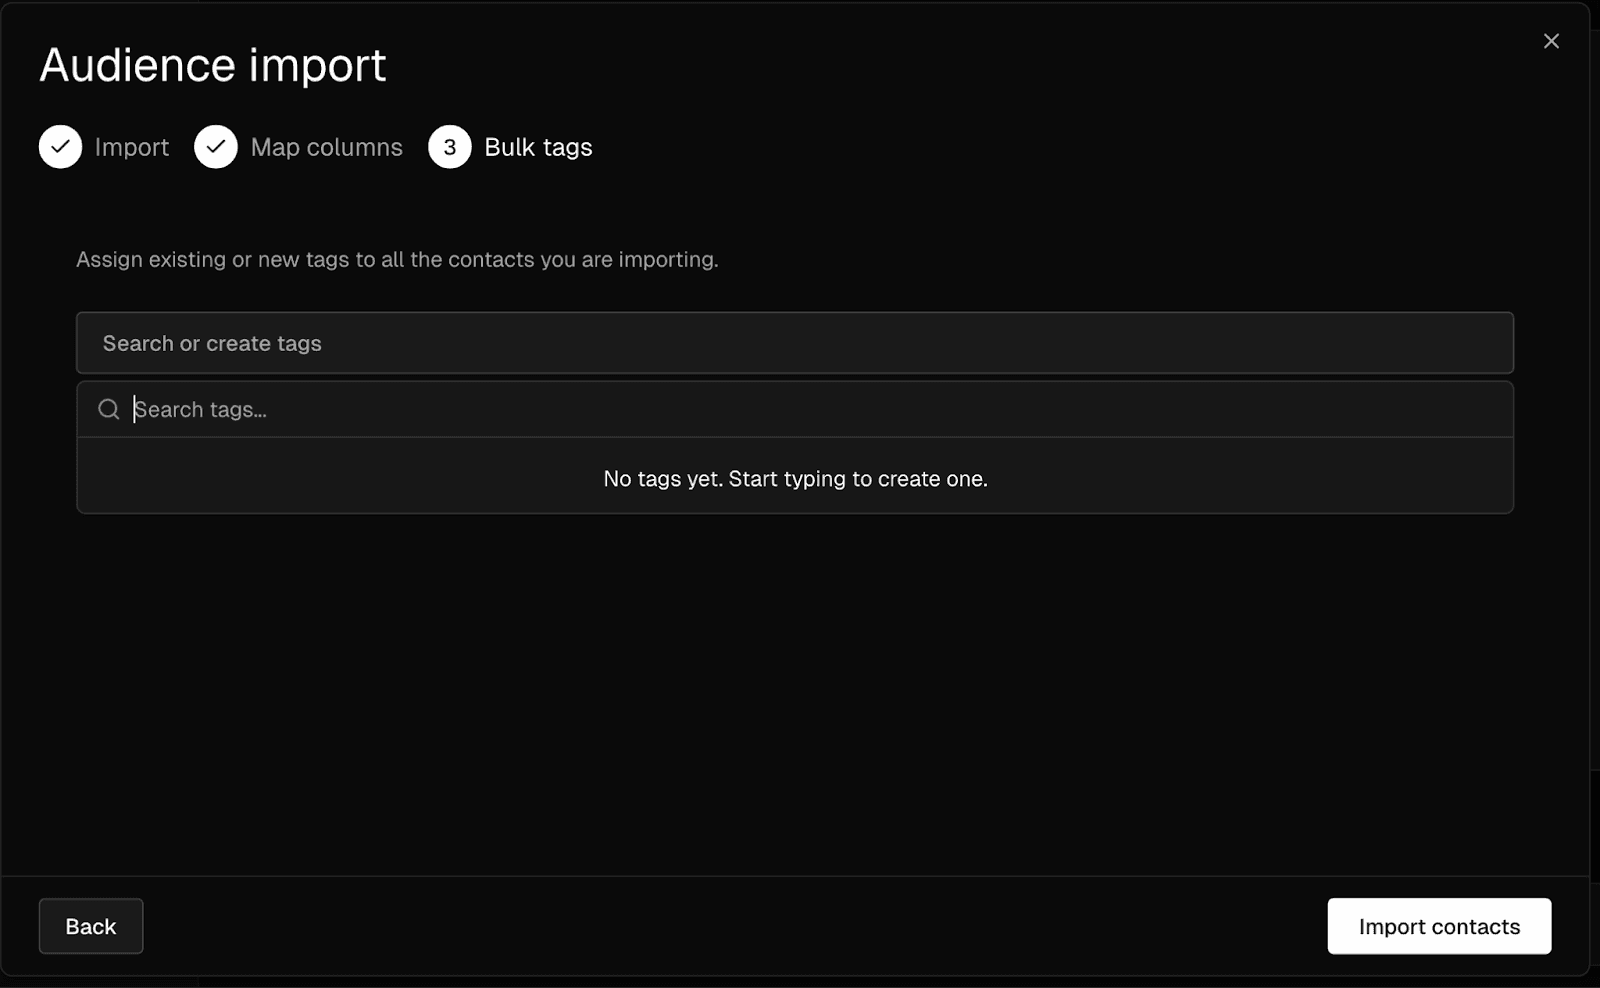
Step 5 - Importing your contacts
When the column mapping looks right, click Import contacts at the bottom-right of the window.

Trackdrop will process your file. Once the import is complete, your contacts will appear in the Audience table.
Common questions
What if a contact already exists?
If an email address in your import already exists in your audience, Trackdrop won't create a duplicate entry.
What if I close the importer mid-way?
If you close the CSV importer after uploading a file, a confirmation box will appear asking whether you want to discard your progress or continue the import.
Click Resume import to go back, or Discard changes to close without importing.
What file types are supported?
Only .csv files are supported at this time.
Can I edit an existing contact?
It’s not currently possible to edit contacts, but you can delete the entry and add them again.
You can re-add the contact individually (read how here), or you can correct their information in your CSV and upload it again.